If you read my last blog post (my first blog post actually 😊) you would see in more detail why I approach blogging the way I am approaching it. I did not build this from scratch, but I have leveraged the work folks from Tailwindcss already did. Most of my creative work is done from an IDE (VS code), and my workflow is; IDE to Git, then do some CI (continuous integration), build, and deploy (continuous delivery). And I have paid attention to what feels like home to me and what is natural to my creative process. Well, you get the idea, I'm a software engineer 😊.
Table of contents
- Setting up a blog
- Getting your hands dirty, shall we begin.
- Cloning the repository
- Project folder structure
- Testing locally
- Customizing your blog
- The build process
- Setting up a Netlify account
- Uploading your site
- Now you can blog away 😊
- What's next?
Setting up a blog
What I will cover in this blog post will help you set up your own blogsite. This is a beginner to Medium level guide and it would require you have the following: Experience: Beginner to Medium level Knowledge:
- ReactJs (Next Js)
- NPM (a little bit of NodeJs)
- Markdown
- Git
Others:
- IDE of choice - VS Code
Getting your hands dirty, shall we begin.
This particular guide will have to be in two parts, having realized that it would be an information overload if I try to keep it as a single post. I do want to be as verbose as possible, but not overload you with information. Do look out for part two, a link will be provided here. In this part, I will be covering the following:
- Cloning the repository
- Project folder structure
- Testing locally
- Customizing the blog
- The build process
- Setting up a Netlify account
- Uploading your newly built blog
- Now you can blog away 😊
What to expect in part two:
- Automating your deployment with Netlify CICD pipeline
- Registering and connecting a domain name to your Netlify site
- Securing your site with Let's encrypt
Cloning the repository
I would recommend you clone directly from my repository, as I can only then guarantee that these steps would keep working for as long as possible, and if there will be changes to the repository in the future, you would be notified of such changes in the steps to follow.
Terminal environment
For Mac users, open Spotlight and type "Terminal". For Windows users, open the Start menu and type "Terminal" 😊 From terminal, you would be able to clone the repository by running the following command, and this is with an assumption that you already have Git installed on your local system and also have a GitHub account set up.
git clone https://github.com/dejibimbolaAyo/blog.git my-blogThe above command, if successfully run, would create a new folder with the name my-blog in the directory from where you ran the above command for cloning.
Tip: To check the path to the directory where you have your newly cloned blog, run this command: On Mac or Linux (or if you are using bash on Windows)
pwdOn Windows, using the command line
chdirTo continue with the rest of the setup, you would need to change the directory to my-blog which has the source code you just cloned from GitHub. Run the following command to change the directory to my-blog
cd my-blogInstalling dependencies
At this point, you may want to open the project in your favorite IDE. You can do this from within the terminal by running this command:
code .This will open the project in Visual Studio Code IDE. The above is with the assumption that you have VS Code installed on your computer. Run the following command to install dependencies via NPM:
npm installWait for all the dependencies to be installed. For you to complete the dependency installation, you would need to have NodeJs and NPM installed. Alternatively, you can use yarn to install the dependencies
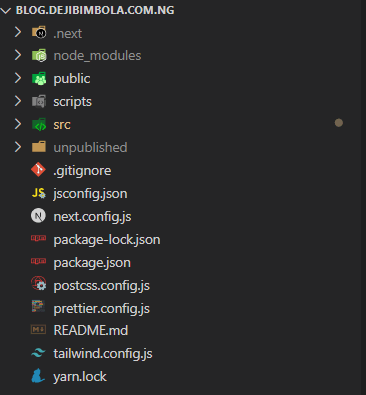
Project folder structure
There are a few folders you may want to consider in the project:
publicfoldersrcfolderunpublishedfolder
Testing locally
Once you have all dependencies installed, you can run your blog locally by running the command:
npm run devCustomizing your blog
Customizing your blog to fit your brand can be easily done by changing a few image assets and maybe some CSS code to change the color scheme, matching what your brand is. For me, I have a yellow scheme on my brand, hence the splash of yellow you see on the blog. What you might consider changing:
- The favicons
- Authors pictures
- The Authors details
- The favicons can be found in the directory
public/ - The Authors pictures can be found in the
src/imgfolder - The Authors details can be found in the
src/authors.jsfile
The build process
The next thing you would want to do before uploading your blog is to generate a build for the blog. With this, we get a static site that has HTML, CSS, Javascript, and image assets, all generated from the React project and ready to be uploaded to Netlify.
The magic, (let's call it magic for now), of building, is handled by the NextJs framework.
The build process creates a new folder out which contains your site assets and files, all prepared to be deployed on a static website host.
To initiate the build process, run this command:
npm run buildOnce this process is done, you will have a out folder with the build output.
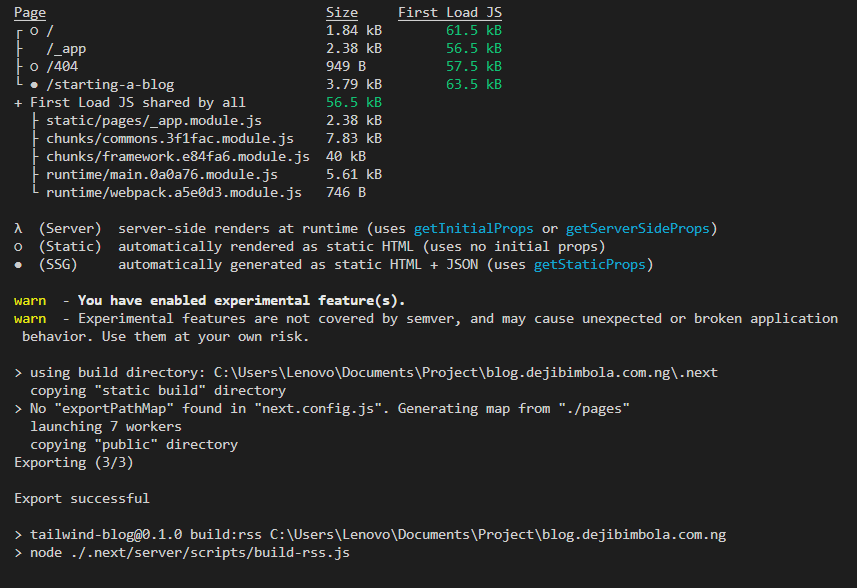
After this is done, you would see the outputted files in the out folder
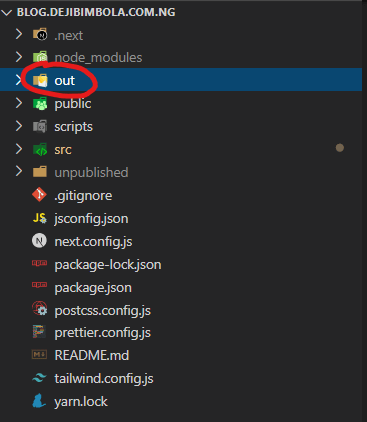
The out folder will later be deployed.
Setting up a Netlify account
Head over to the Netlify website and create an account. Visit Netlify, or search for Netlify with your search engine of choice. Create an account through the available sign-up option. Upon account creation, you are ready to upload your first website.
Uploading your site
Once done with account creation, you are ready to upload your first site. This is straightforward for fresh accounts, while existing an account with existing sites may need some extra steps to take to upload a new website. Follow the prompt to drag and drop your website.
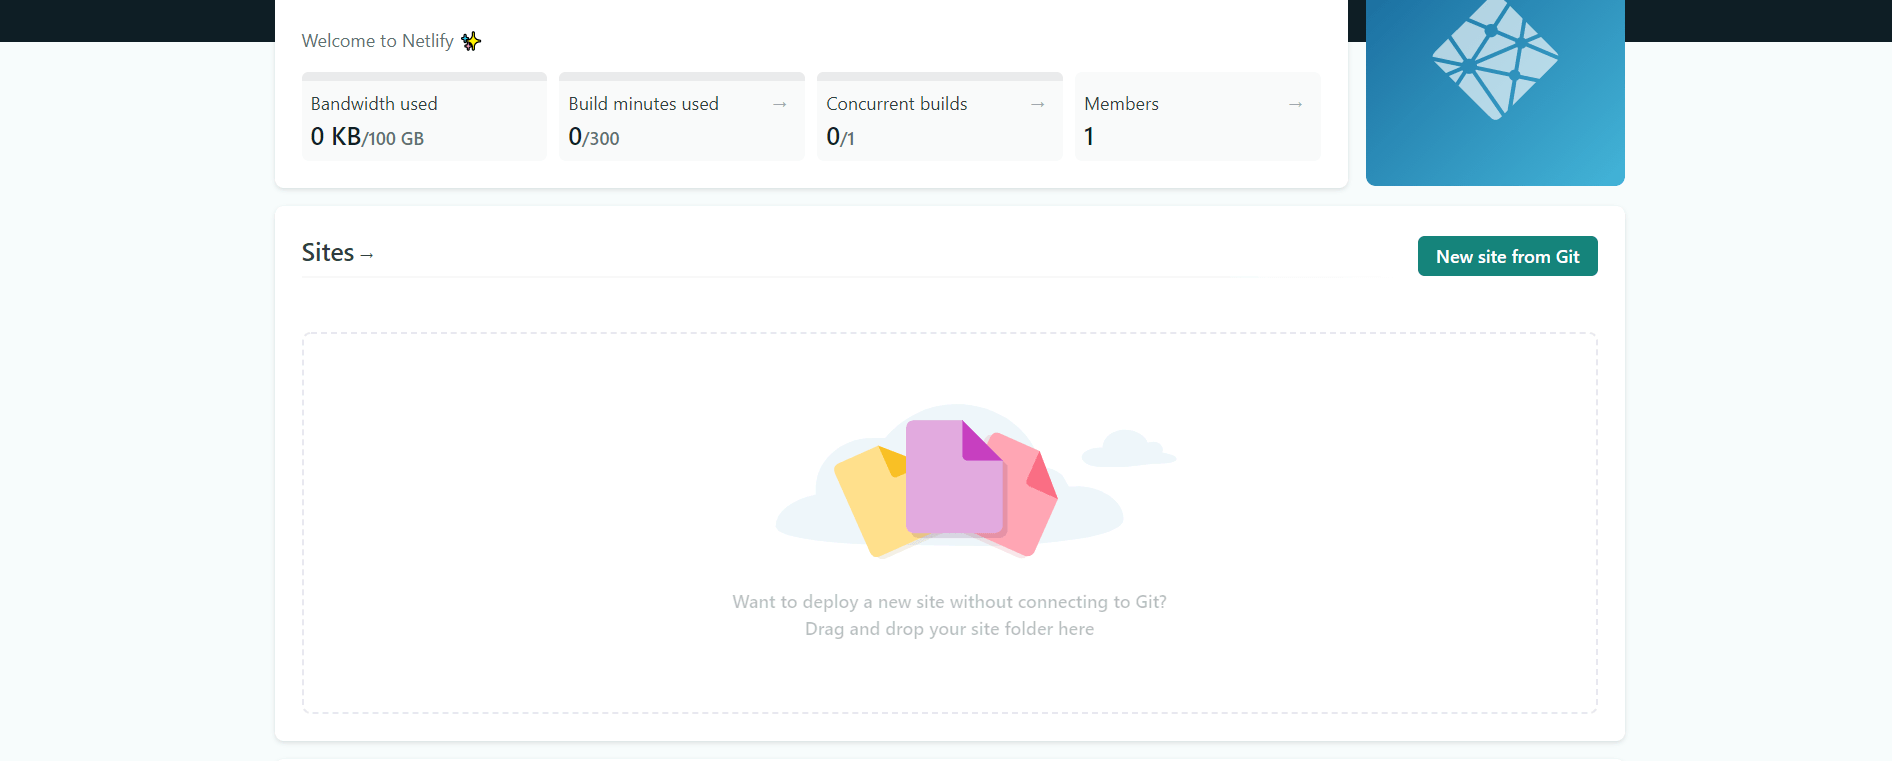
You would be provided with a link to your new website, and you are good to go.
Now you can blog away 😊
Have your first blog post written, now nothing can stop you. You to the world.
What's next?
Yes, this is not the end, as this is not all there is to the setup. This does not yet offer the best developer experience we are hoping to get, so look out for the second part to this post, where I would cover the following and more:
- Automating your deployment with Netlify CICD pipeline
- Registering and connecting a domain name to your Netlify site
- Securing your site with Let's encrypt
